2017-07 Lindas She Shed
Since before we were ready to move back to our home this summer, Linda has been wanting a"She Shed." She describes it as the female version of a Man Cave but lots prettier.
First of all, we had to contract out the work we couldn't do and we spent leftover savings for it.
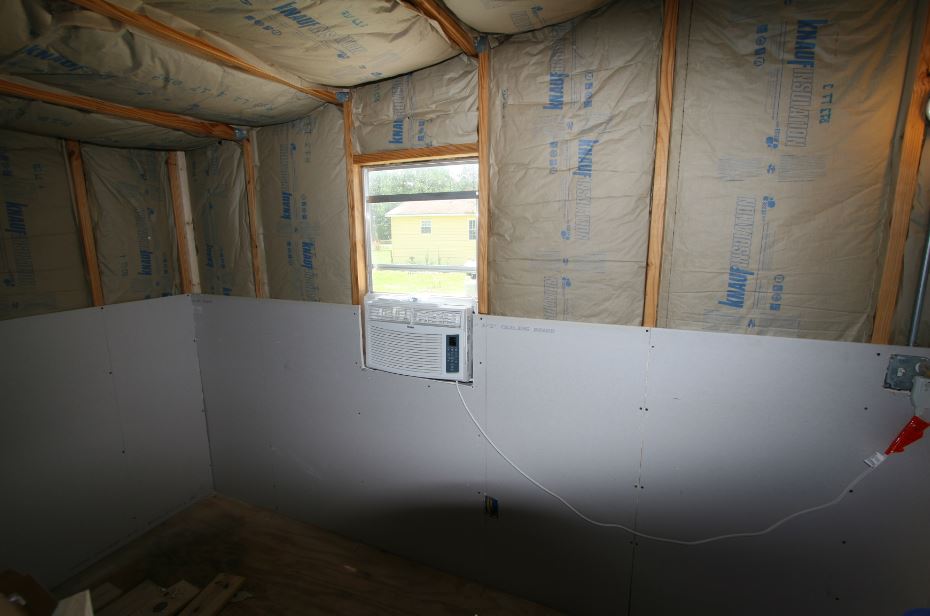
Before contractors could do the drywall we had some electrical outlets installed then insulated
the building. My hat's off to NRGsavers, Stan Thompson, for those jobs.
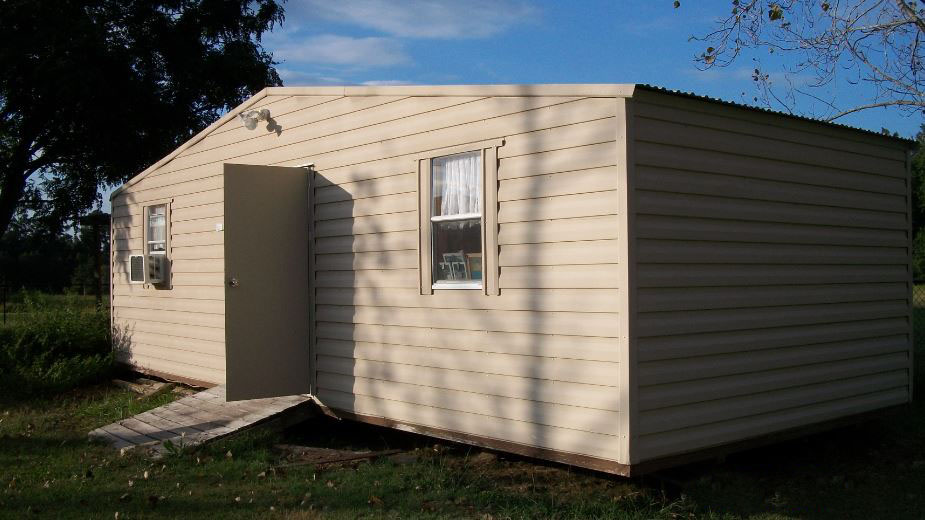
Here's what the building looked like on the outside.
Here it is after the wiring and insulation as the drywall was being installed.
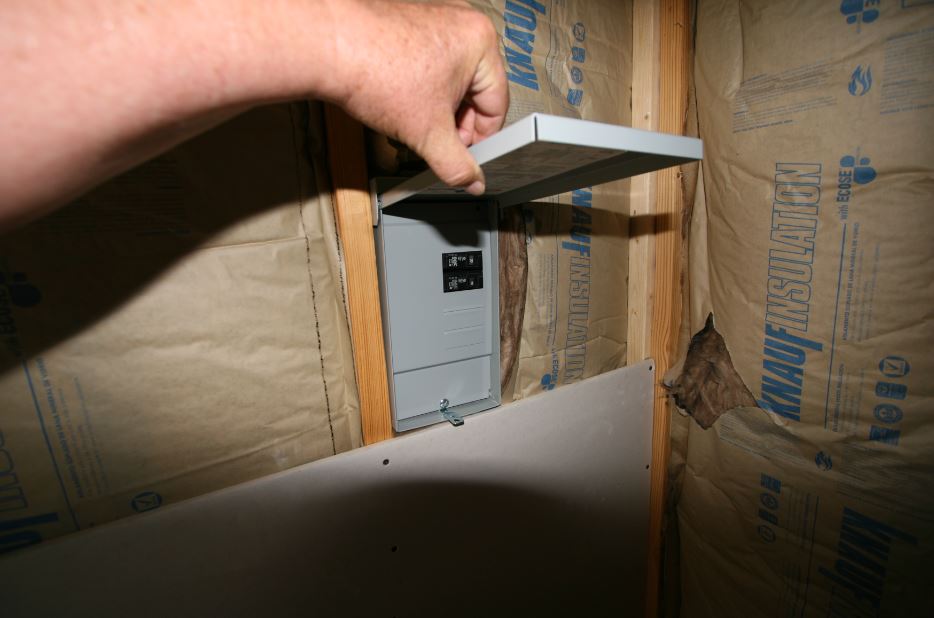
I like a main breaker to turn off all the power at once. To save money, we installed this type box.
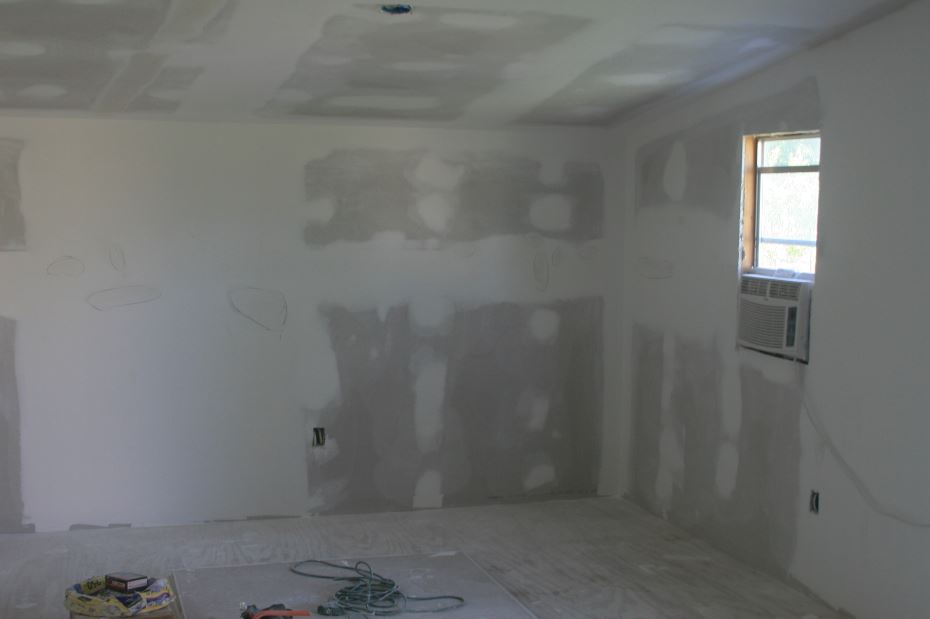
Here's what the interior looked like after the drywall was partially finished.
There was still a ton of stuff piled floor to ceiling in the center of the storage building after the drywall was installed.
Once that could be cleared we could have the walls painted. I'm very grateful to my grandchildren Floyd and Jori
Freestone for supervising (and doing most of the work) to get that done and for Jori's brother and sisters, Dani,
Devin, and Andi Vincent for moving all that stuff. Thanks to them, contractors were able to spray the entire
interior of the building. Linda painted the floor and stained the door & window trim. I cut and installed it.
After all the trim work was done, all that remained was to build her shelves and desk then begin moving our
belongings back into the building. So let me see if I have this straight...
(1)
In May 2016, we moved our stored items from our storage buildings to three rented storage units.
That was the first time we moved it.
(2)
The cost of 3 storage units was a bit much so we paired down our stuff. That let us move it
again condensing it down to 2 storage units. That was the second time we moved it.
(3)
Then a much larger storage unit became available. It was less expensive than the 2 units so
we moved all our stuff again from 2 units into one. That was the third time we moved it.
(4)
When we moved back, Linda's future She Shed was the only storage building available.
As we began emptying the rented storage unit and moving back into our home,
her building filled up first. That was the fourth time we moved it.
(5)
With the sheetrock drywall installed, we were ready to finish the drywall and paint it.
It was impossible to finish the job without moving everything so we moved it
from the She Shed to the small storage building packing the little building
from wall-to-wall and from floor to ceiling. That was the fifth time.
(6)
Once the interior was painted, the trim installed, and the shelves built, we could
FINALLY put the stuff BACK where it was intended to be all along. We had
moved all these plastic containers full of stuff plus some odds and ends,
all 640 cubic feet of it weighing about 2 tons at least SIX TIMES in
the past 12 months. I think my back is hurting...
I'm gonna go lay down.
BUT FIRST -- Let me show you what Linda's She Shed looks like finished, furnished,
and decorated. A lot of the stuff we had in contaniers were decor she's collected
over the years. She's found some fantastic bargains at thrift stores and yard sales.
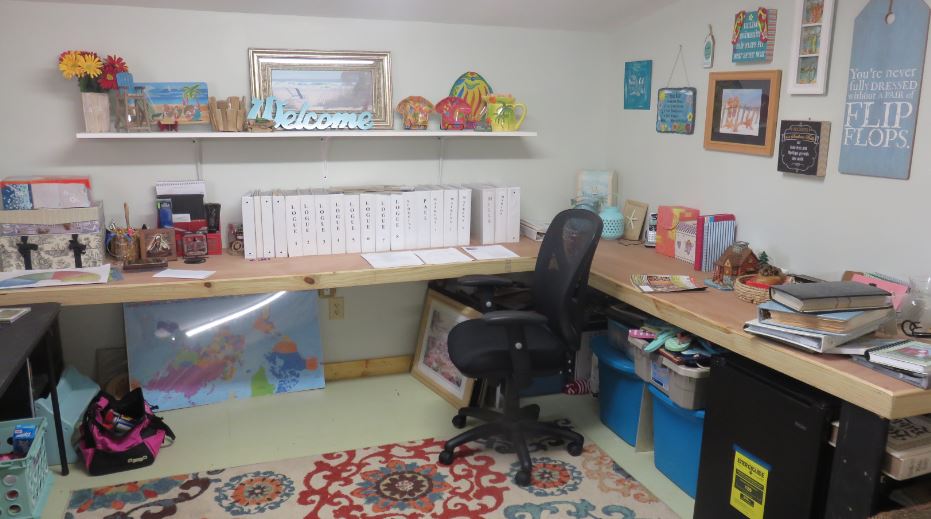
When you step through the door and look to the right, here's what you see.
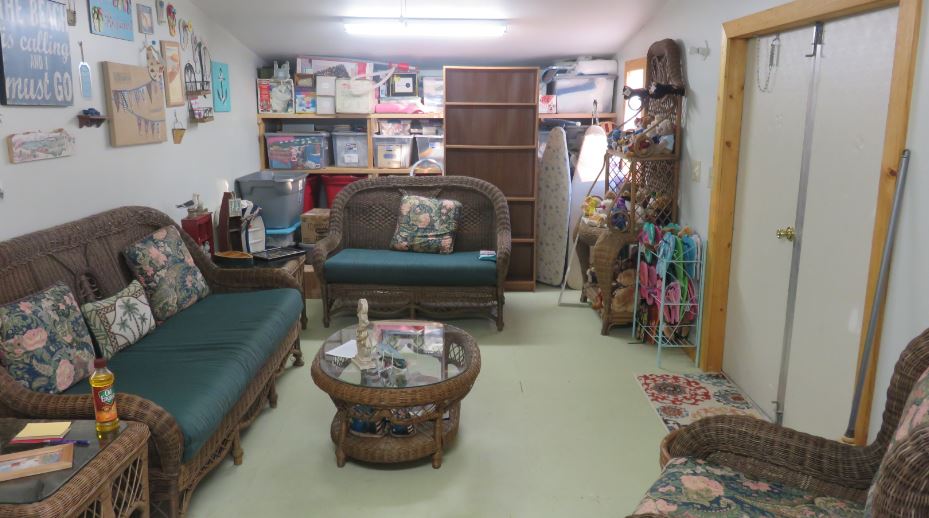
The wicker furniture was from a good friend. When he saw the wicker chair in our living room, he told us he had
in storage that he would probably never use and asked if we wanted to buy it. He gave us a price we couldn't and
here it is, a very nice collection including a chair, a love seat, a coffee table, two end tables, and a bookcase / display
case which Linda filled up with her teddy bear and stuffed animal collection.
Here's a closer view of the shelves (below). They were Linda's design and would have looked great if I had spent
some time laying things out first. But no, wise old Ron thought they were so simple he could throw them together
on the fly (that wasn't too wise). Nothing went like I wanted it to. Some of the cuts were wrong, boards didn't fit.
On average, most of the shelving looked really thrown together instead of carefully planned. Oh, well. At least the
shelving is functional and sturdy.
I liked Linda's design idea. With a little planning they could have been made to be free standing. Instead, I save
lumber by mounting ledger boards on the walls and attaching the 2 x 2s to them. Fortunately the measurements
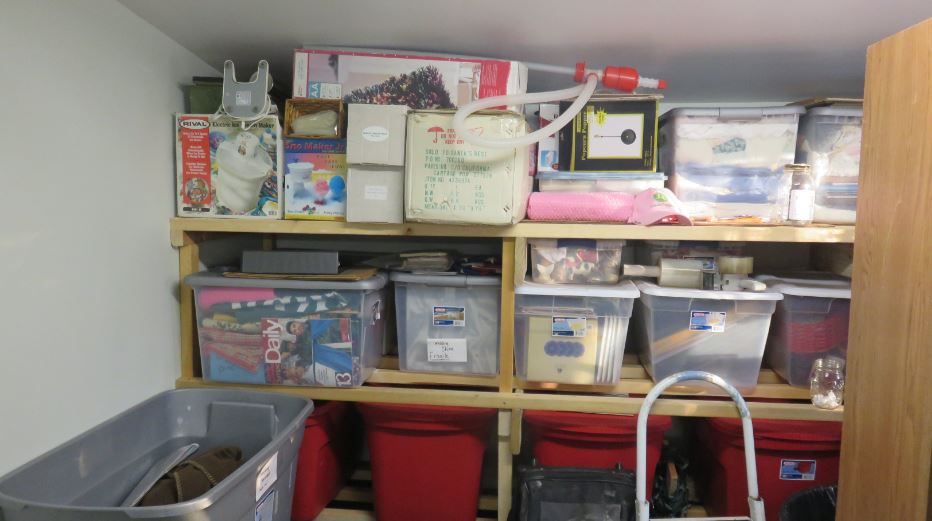
weren't too far off so that all the containers fit nicely after Linda had gone through all of them.
Originally, there were at least 3 or 4 times as many containers as you see here. Now that she had a place to work,
she took everything out of them and rearranged everything. She removed things from smaller containers and put
it all in larger ones where things would fit. Mostly she grouped things so that (as you can see below) the majority
of the Christmas decor went into the red containers on the bottom.
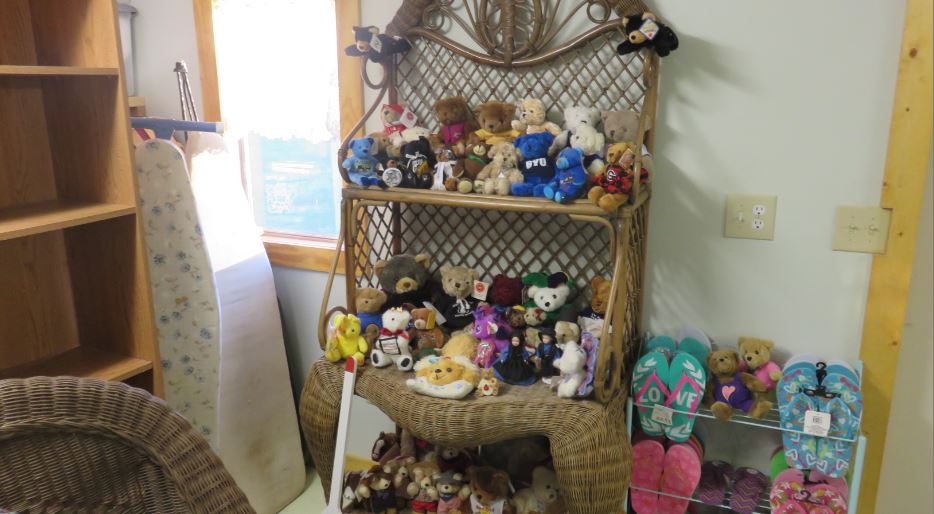
Here's a closer look at Linda's bear collection alongside her flip-flops collection. We've travelled a lot and there are
bears from all over the U.S. and one from Canada.
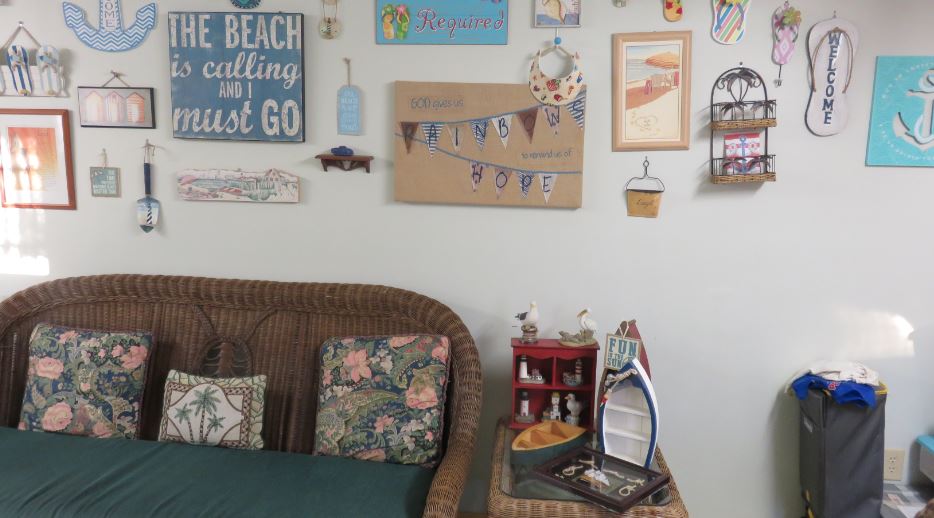
The above photos are looking to the right as you enter the She Shed. If you look straight in front of you as you come
in, this is what you see. Lots of Linda's decor has focused on the beach. That's why the anchors and beach theme.
And below the wall decor is the wicker sofa with one of the end tables.
This last interior photo is a view to the left of the custom desk I built Linda. Not too fancy, just a free standing
wall-mounted, two-foot wide work surface made of 3/4 inch Birch plywood with a natural finish. Large, heavy
triangular shaped wall brackets support the center portions so there's lots of legroom. For the ends, we found
an old VCR tape display case I had built that we no longer use. Linda suggested cutting it in two and putting
each half at the ends of the desk. She uses these as book shelves.
I have to thank my friend Art Burr for the idea of capping the edging. Instead of your usual plywood trim,
Art suggested a wider surface with a Rabbet Cut in the topside. The rabbet provides a groove for the 3/4
inch plywood and the remainder of the trim's surface below the plywood provides extra support. This really
cool way of trimming it makes wall-attached desks, shelving, or anything attached to the wall very rigid.
This desk spans 8 feet in one direction and 10 feet in the other so I made the trip board extra wide. The 10
foot span has only 3 supports but it's still strong enough to support my weight and only gives about a
quarter inch in the middle.
That's a small refrigerator closest to you on the right side. In front of you, those are her genealogy books
containing all the family research she's done in the past 4 decades. Beneath the desk are containers full of
future projects she plans to work on and to the left is a folding table for the temporary sorting and grouping
of decor.
Those projects are on hold for now, though. Lately all we've done is yard work because of the damage to
our property from the hurricane. Ah, but that's another photo essay. This is all I have about her She Shed
for now except for one more photo I've been saving for last. See it below.
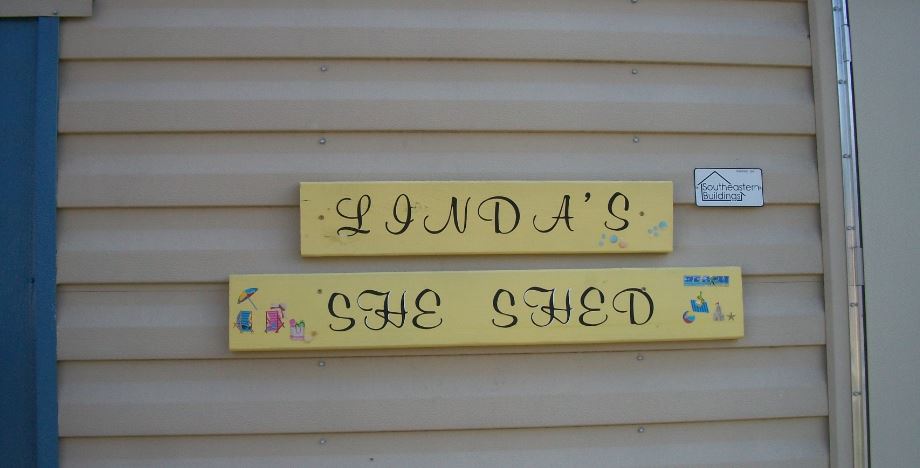
Here's the photo I saved for last. Linda had me cut two pine boards for her. She said she was going to use them
for her "sign" but I didn't know exactly what she had in mind. All I did was cut the boards to her measurements
then roundover the edges with my router table. I sanded them. She painted them and attached the lettering and
other decor. I love it! I hope you enjoyed this.
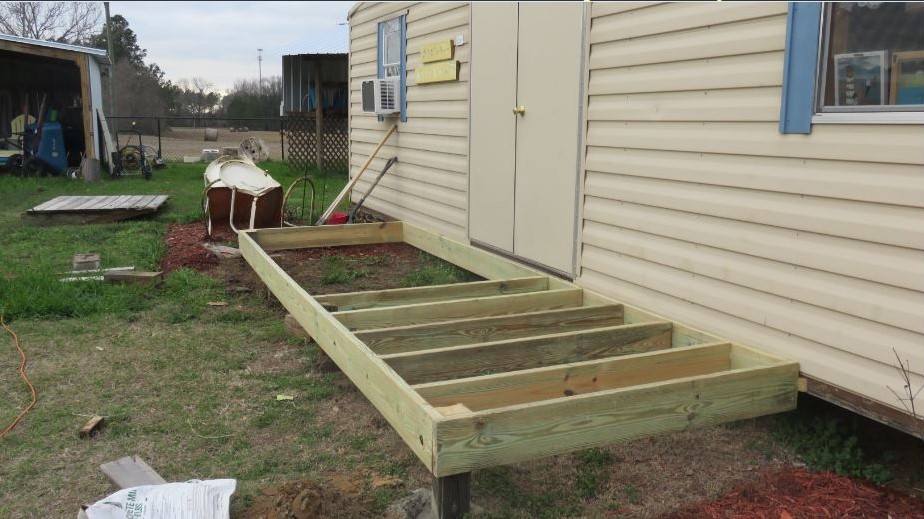
2018 UPDATE - Linda wanted me to replace the ramp with a porch. Here it is under construction.
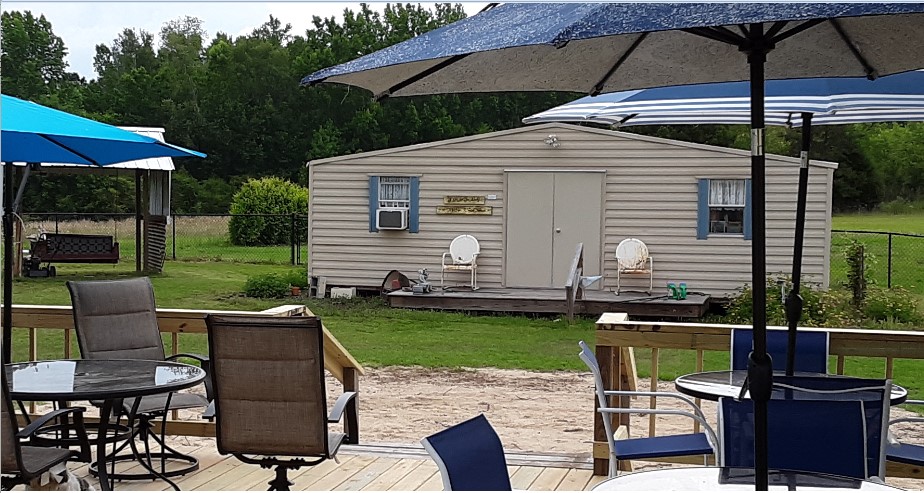
2019 UPDATE - Here's a view of Linda's She Shed porch from our deck. I added steps and a handrail. She's
decorated it with various types of chairs and such since then. It looks great when all the flowers are blooming.
~ END ~